Please watch my short testimonial on Radiant Revive Face Creme.
parkerstyle
Thursday, April 19, 2018
Sunday, January 1, 2017
New Year's Day Black-Eyed Peas and Collard Greens
Happy New Year! It's not too late to cook up a quick pot of these delicious black-eyed peas to give you luck and happiness in 2017!
I grew up in Northern California and I was unaware of this southern tradition that my Floridian husband and his family schooled me on. In fact, it is such a tradition that we had to have a coast-to-coast show and tell group text to share our dedication. :-)
History would tell that the idea of black-eyed peas being lucky dates back to the Civil War. One source from Alabama shares this story...
"....Northern troops considered the peas to be suitable only for animals so they were one of the few edible things left behind by raiding soldiers. The "lucky" peas made their way to Southern tables, especially those of Southern slaves who celebrated emancipation as ordered by President Abraham Lincoln on Jan. 1, 1863.
After the war, peas were always eaten on the first day of January. Many people believe that if you cook the peas with a new dime or penny, the person who gets the coin in their bowl will receive extra luck. The origins of greens as New Year's meal is fairly simple: green is the color of money and eating them will guarantee wealth in the coming months.
Any green will do, though the most common are collard, turnip or mustard greens, usually accompanied by salt pork - both abundant items in the Civil War South. Tradition states that you will receive $1,000 for every bite of greens you take on New Year's Day." Leada Gore, AL.com (Follow her on Twitter).
So why not give it a shot?! We need all the luck we can get! These are so good.
Here is the recipe:
NEW YEAR'S DAY BLACK-EYED PEAS AND COLLARD GREENS
3 cans chicken stock + water (as needed)
1 yellow onion diced
1 green bell pepper diced2 stalks celery diced
2 gloves minced garlic
4 slices bacon cubed
1 ham hock
1 lb dried black-eyed peas (don't have to be soaked overnight...it will just need to simmer longer)
2 bay leaves
1 tsp dried thyme
1 T creole seasoning (Tony Chachere's)
1 bunch of collard greens chopped (spines cut out)
salt to taste
-Saute bacon, onions, celery and bell pepper until tender and bacon is cooked
-Add chicken stock, ham hock, and peas and bring to a boil
-Reduce heat and simmer until the peas are tender
-When peas are tender, turn off burner and put the collard greens in the pot and close the lid. ---This will make the greens wilt, but not be overcooked.
-Add chicken stock, ham hock, and peas and bring to a boil
-Reduce heat and simmer until the peas are tender
-When peas are tender, turn off burner and put the collard greens in the pot and close the lid. ---This will make the greens wilt, but not be overcooked.
Serve with cornbread. I use the little Jiffy mixes. :^)
Tuesday, October 25, 2016
Thai Coconut Curry Chicken Soup
The cafeteria at my work made this recently and I could not get enough of it! My friends and I kept going back for more as if it was one more scoop of ice cream! Yeah, that good. So, I started looking at different recipes out there and came up with a hodge podge that suited my tastes.
It's hitting the spot on these drizzly Fall days and my whole family loved it. Oh, did I mention that it's super easy? Just get ready to get your chop on. There is a lot of chopping involved. Put on some tunes and get in the zone. You'll be rewarded with this soup for sure. The best thing about this soup is that you don't have to make a roux to get that cheesy flavor. This soup is not too "curry-y" either. Haha. Side note: this soup is Whole 30 approved and Gluten Free as well! Eat up, guilt free!
Here is the recipe:
1 T fat of your choosing (ghee, vegetable oil, olive oil, coconut oil)
1 - chopped yellow onion
2 - minced garlic cloves
1 tsp fresh minced ginger
1 - sliced red or orange bell pepper
3 - cubed potatoes (leave skins on)
1/2 butternut squash cubed
5 ot 6 baby bok choy
2 handfuls baby spinach
1 rotisserie chicken -or- 4 cooked chicken breasts
1 - 32 oz. Chicken broth
2 cups water
2 - 14 oz. cans coconut milk (lite or full fat, it's up to you!)
1 packet -or- 1 T yellow curry paste (mild - You can find these for sure at an Asian market or in the ethnic cooking aisle at the grocery store)
1 tsp salt (Add more or less to your liking)
(optional: Add fish sauce if desired and garnish with cilantro and lime, I did not and it was yummy anyway)
*** This soup is NOT spicy. I recommend using the red curry paste if you want to spice it up.
Instructions:
- Melt fat of your choice in large pot
- Saute onions, ginger, garlic, and peppers until tender.
- Add cubed potatoes, butternut squash, and the chopped thick ends of the bok choy.
- Add water as needed to keep from burning.
- When veggies are all tender, add chicken stock, coconut milk and curry paste.
- Add the chicken, bok choy leaves and spinach leaves last and turn the burner to low. (You don't want to overcook the delicate leaves or chicken)
- Add salt as needed.
- Ladle into bowls and garnish as you please!
Hope you enjoy this as much as we did! It is a very beautiful dish as well!
Sunday, October 16, 2016
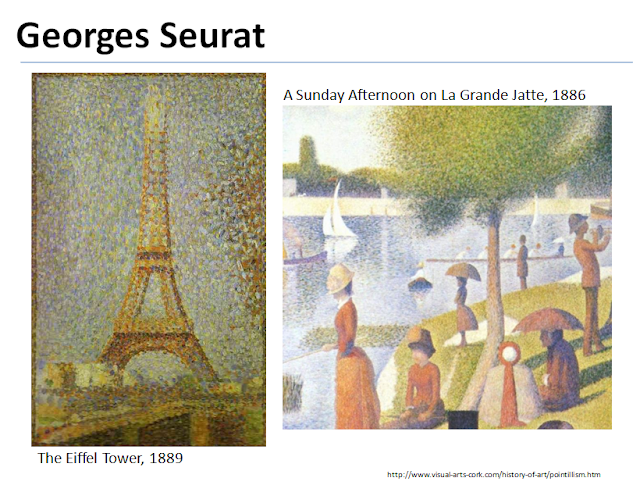
Autumn Art Lesson - Pointillism
5th Grade Art Docent Lesson - Pointillism
In an effort to get back to engaging my artistic side and give back to the community at the same time, I have volunteered to be an art docent for my son's class this year. Check out our first lesson of the year on Pointillism. The kids enjoyed it and so did I!
Lesson on Pointillism:
I tried to keep the lesson very short so we would have plenty of time to complete the activity.
Bring in leaves that you have collected as inspiration or print a few pictures of fall leaves.
Encourage the kids to take their time and remember to make dots rather than brushstrokes with their Q-tip.
Before setting the kids off on their own, perform a quick demonstration for the class on a leaf of your own on the board or on a projector camera. Refresh the kids' memory on primary color mixing. Have the kids start by using all yellow or all red and introduce blue or red on the edges to make green or orange. Remind them to not be modest with the paint or mixing colors will be difficult.
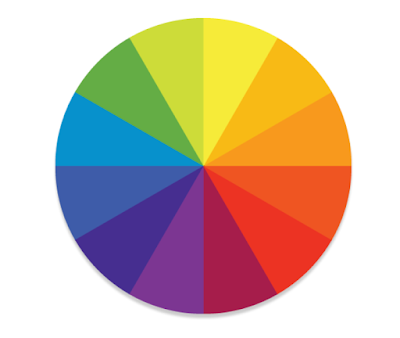
I had other tempera paints for the kids to choose a background color for their art to make their leaves stand out more on the page. When doing this, show them the color wheel and teach them that the colors opposite each other on the color wheel will have the most contrast and will make their art really pop.
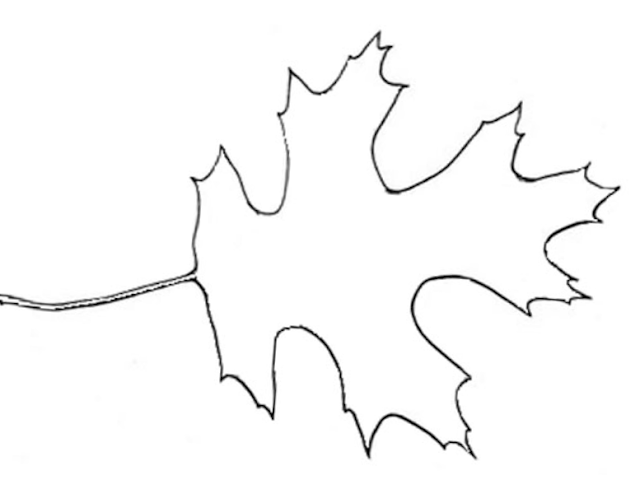
Leaf Outlines to create stencils on Cardstock:
Make plenty of stencils for the class to make that step in the process go quicker. I also encouraged freehand drawing their leaves for those who wanted to.
In an effort to get back to engaging my artistic side and give back to the community at the same time, I have volunteered to be an art docent for my son's class this year. Check out our first lesson of the year on Pointillism. The kids enjoyed it and so did I!
Materials Needed:
- Qtips
- Small Paper Plates
- Tempera Paints (At the minimum, Primary Colors)
- Card Stock Sheets (Standard Letter Size)
- Baby Wipes or Disinfectant Wipes for Clean up
Time Needed for Activity:
- Minimum of 1 hour
Examples:
I tried to keep the lesson very short so we would have plenty of time to complete the activity.
Encourage the kids to take their time and remember to make dots rather than brushstrokes with their Q-tip.
Before setting the kids off on their own, perform a quick demonstration for the class on a leaf of your own on the board or on a projector camera. Refresh the kids' memory on primary color mixing. Have the kids start by using all yellow or all red and introduce blue or red on the edges to make green or orange. Remind them to not be modest with the paint or mixing colors will be difficult.
I had other tempera paints for the kids to choose a background color for their art to make their leaves stand out more on the page. When doing this, show them the color wheel and teach them that the colors opposite each other on the color wheel will have the most contrast and will make their art really pop.
Leaf Outlines to create stencils on Cardstock:
Make plenty of stencils for the class to make that step in the process go quicker. I also encouraged freehand drawing their leaves for those who wanted to.
I hope your class enjoys this project!
Saturday, October 15, 2016
Gift Wrap with Elements from Nature
Sycamore Gift Wrapping Accent
Ever wonder what to do with these cool spikey balls from your sycamore tree? Besides having all the kids in the neighborhood collect them and have a war, or having them all "shoot hoops" into the yard waste bin to clean them up.... use them for decorating!
Orange wrapping paper from Home Goods with scrapbooking paper accents and raffia.
Don't think too much. Just start layering paper and add interesting sticks, leaves, pinecones or sycamore spikey balls as the finishing touch!
Thursday, July 25, 2013
Painter's Tape Kid Masterpieces!
I'm the type of person who likes to have decor in my home that means something to me. While I do have a few nice paintings and prints from Home Goods, etc., my favorite things in my home are my children's art or pieces that I've made.
I began this project with the idea to cut out a design on contact paper with a craft knife after applying to a canvas, but that scared me off real quick. We used torn pieces of blue painter's tape instead.
These are the steps that we took to create these beautiful pieces of art that the kids are just busting with pride over. They also kept commenting on how much fun it was, instead of, "Mom, can we work on this later?!"
First, the kids rolled a couple coats of white paint onto the canvas. We used some white satin water-based paint I had laying around and let it dry overnight.
The next day when they were getting fidgety, I sat them down with an idea of what design to shoot for and a roll of blue painter's tape. They ripped small pieces off themselves and created what would later be the contrasting design.
When all the tape was in place and edges smoothed down. I set up a painting table with an old sheet and let them have at it. I explained how to mix colors and explore with the paints.
When all the white areas are painted, you can begin to carefully peel the blue tape off.
What you are left with is a beautiful piece of artwork! When the paint dries completely, I gave them a navy blue sharpie to write their names in each corner, just like artists do!
Subscribe to:
Comments (Atom)


